Micropython
Micropython (https://micropython.org/) is an implementation of the Python 3 language for microcontrollers. While this might sound like a stupid idea at first (why use a high level garbage collected language on low level hardware?), the creator Damien George has put a great amount of effort into this project. And it's safe to say that it turned out great. For more information and implementation details, see the links on the start page of micropython.org.
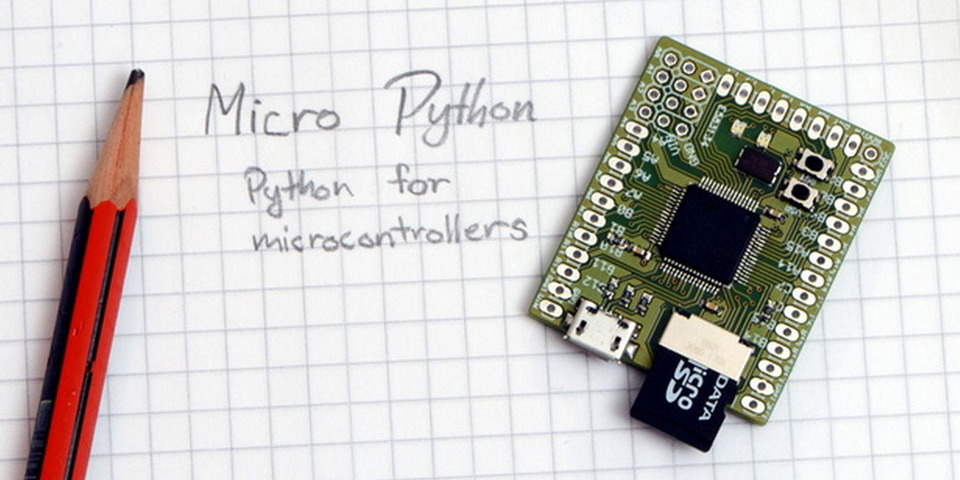
Micropython is not just a language, there is also a hardware board designed to run Python. The development and production costs were funded via Kickstarter. As a backer, I'm one of the lucky people that can already hold one of these things in their hands.
To "program" the board, you simply copy a file called main.py to the FAT16 filesytem on the board. This is a regular Python file, but additionally to the standard library, you can also use a module called pyb. This module gives you access to the hardware functions of the board, like LED control, I2C / SPI communication, accelerometer status, interrupt handling and more.
The board even provides a REPL if you connect to it via serial console:
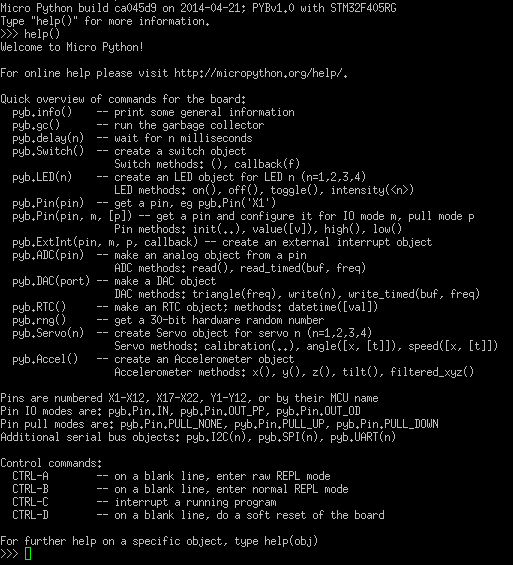
How awesome is that? This is amazing for debugging purposes.
Sparkling LEDs
The board features four LEDs in different colors. Because blinking LEDs are the "Hello World" of microcontrollers, I came up with this quick script:
import pyb

leds = [pyb.LED(i) for i in [1, 2, 3, 4]]

def sparkle(delay):
    for led in leds:
        led.on()
        pyb.delay(delay)
    for led in leds:
        led.off()
        pyb.delay(delay)

while 1:
    sparkle(60)
This is what it looks like:
Using the Accelerometer
Another built-in feature that you can use without soldering is the accelerometer. You first instantiate the pyb.Accel() class and can then request the current value for the x, y and z axis.
According to the docs, the values should be between -30 and 30 (although I've observed some values outside of that range). To visualize the values, I simply translate the accelerometer range 0-30 to the LEDs 1-4: With an absolute acceleration between 0 and 7.5, one LED lights up while for an acceleration between 22.5 and 30 all four LEDs light up.
"""
Small program to show the acceleration of the x and y axis on the LEDs. The
more you accelerate the board, the more LEDs light up.
"""
import pyb
import math

leds = [pyb.LED(i) for i in [1, 2, 3, 4]]
ac = pyb.Accel()

def accel():
    """
    Return the maximum absolute acceleration in x or y direction.

    Should return values between 0 and 30.

    """
    vals = [abs(x) for x in [ac.x(), ac.y()]]
    return max(vals)

def show_leds(n):
    """
    Enable n LEDs.

    The parameter n should be in the 1..4 range.

    """
    for i, led in enumerate(leds, 1):
        if i <= n:
            led.on()
        else:
            led.off()

while 1:
    a = accel()
    nof_leds = math.ceil(a / 7.5)
    show_leds(nof_leds)
    pyb.delay(5)
An easy way to test this program is to hold the board vertically. This causes gravity to "pull" on the accelerator – the LEDs light up.